前言 常在河边走,哪能不湿鞋?
今天有客户联系说误更新数据表,导致数据错乱了,希望将这张表恢复到 一周前 的指定时间点。
数据库版本为 11.2.0.1
操作系统是 Windows64
数据已经被更改超过1周时间
数据库已开启归档模式
没有DG容灾
有RMAN备份
下面模拟一下问题的详细解决过程!
一、分析 以下只列出常规恢复手段:
数据已经误操作超过一周,所以排除使用UNDO快照来找回;
没有DG容灾环境,排除使用DG闪回;
主库已开启归档模式,并且存在RMAN备份,可使用RMAN异机恢复表对应表空间,使用DBLINK捞回数据表;
Oracle 12C后支持单张表恢复;
结论:安全起见,使用RMAN异机恢复表空间来捞回数据表。
二、思路 客户希望将表数据恢复到 <2021/06/08 17:00:00> 之前某个时间点。
大致操作步骤如下:
主库查询误更新数据表对应的表空间和无需恢复的表空间。
新主机安装Oracle 11.2.0.1数据库软件,无需建库,目录结构最好保持一致。
主库拷贝参数文件,密码文件至新主机,根据新主机修改参数文件和创建新实例所需目录。
新主机使用修改后的参数文件打开数据库实例到nomount状态。
主库拷贝备份的控制文件至新主机,新主机使用RMAN恢复控制文件,并且MOUNT新实例。
新主机RESTORE TABLESPACE恢复至时间点 <2021/06/08 16:00:00> 。
新主机RECOVER DATABASE SKIP TABLESPACE恢复至时间点 <2021/06/08 16:00:00> 。
新主机实例开启到只读模式。
确认新主机实例的表数据是否正确,若不正确则重复 第7步 调整时间点慢慢往 <2021/06/08 17:00:00> 推进恢复。
主库创建连通新主机实例的DBLINK,通过DBLINK从新主机实例捞取表数据。
📢 注意: 选择表空间恢复是因为主库数据量比较大,如果全库恢复需要大量时间。
三、测试环境模拟 为了数据脱敏,因此以测试环境模拟场景进行演示!
⭐️ 测试环境可以使用脚本安装,可以使用博主编写的 Oracle 一键安装脚本,同时支持单机和 RAC 集群模式!
开源项目:Install Oracle Database By Scripts!
更多更详细的脚本使用方式可以订阅专栏:Oracle一键安装脚本 。
1、环境准备 测试环境信息如下:
节点
主机版本
主机名
实例名
Oracle版本
IP地址
主库
rhel6.9
orcl
orcl
11.2.0.1
10.211.55.111
新主机
rhel6.9
orcl
不创建实例
11.2.0.1
10.211.55.112
2、模拟测试场景 主库开启归档模式:
1
2
3
4
5
6
7
8
9
10
11
12
13
14
15
16
17
18
19
20
21
sqlplus / as sysdbasystem set log_archive_dest_1='LOCATION=/archivelog' ;
创建测试数据:
1
2
3
4
5
6
7
8
9
10
11
12
13
14
15
16
17
18
19
20
21
22
23
24
25
26
27
28
29
30
31
32
33
sqlplus / as sysdbacreate tablespace lucifer datafile '/oradata/orcl/lucifer01.dbf' size 10 M autoextend off ;create tablespace ltest datafile '/oradata/orcl/ltest01.dbf' size 10 M autoextend off ;create user lucifer identified by lucifer;grant dba to lucifer;create table lucifer(id number not null ,name varchar2(20 )) tablespace lucifer;insert into lucifer values (1 ,'lucifer' );insert into lucifer values (2 ,'test1' );insert into lucifer values (3 ,'test2' );commit ;1 2 3 4 5 6 7 8 9 10 11 12 13 14 15
进行数据库全备:
1
2
3
4
5
6
7
8
9
10
11
12
13
14
15
16
17
18
19
20
21
22
23
24
25
26
27
28
29
30
31
32
33
rman target /run {type disk;type disk;"alter system switch logfile" ;type disk;include current controlfile format '/backup/backlv0_%d_%T_%t_%s_%p';INPUT ;
模拟数据修改:
1
2
3
4
5
6
7
8
9
10
11
12
13
sqlplus / as sysdbadelete from lucifer where id=1 ;update lucifer set name ='lucifer' where id=2 ;commit ;1 2 3 4 5
📢 注意: 为了模拟客户环境,假设无法通过UNDO快照找回,当前删除时间点为:<2021/06/17 18:10:00> 。
如果使用UNDO快照,比较方便:
1
2
3
4
5
6
7
8
9
10
11
12
13
sqlplus / as sysdbaselect * from lucifer.lucifer as of timestamp to_timestamp('2021-06-17 18:05:00' ,'YYYY-MM-DD HH24:MI:SS' );create table lucifer.lucifer_0617 as select * from lucifer.lucifer as of timestamp to_timestamp('2021-06-17 18:05:00' ,'YYYY-MM-DD HH24:MI:SS' );1 2 3 4 5
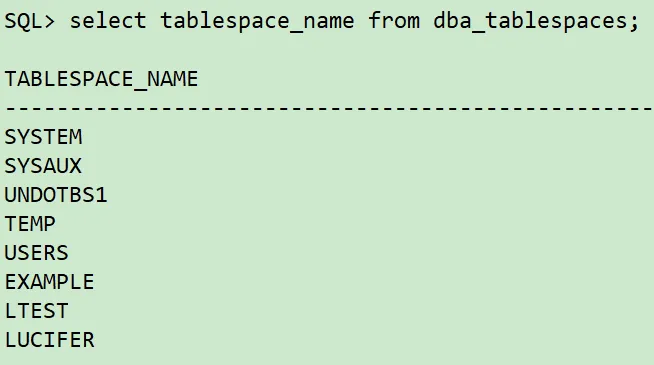
四、RMAN完整恢复过程 主库查询误更新数据表对应的表空间和无需恢复的表空间:
1
2
3
4
5
6
7
8
9
10
11
12
13
sqlplus / as sysdba## 查询误更新数据表对应表空间 select owner,tablespace_name from dba_segments where segment_name='LUCIFER' ;## 查询所有表空间 select tablespace_name from dba_tablespaces;1 2 3 4 5
主库拷贝参数文件,密码文件至新主机,根据新主机修改参数文件和创建新实例所需目录:
1 2 3 4 5 6 7 8 9 10 11 12 13 14 15 16 17 18 19 20 21 22 23 24 25 26 27 28 29 30 31 '/home/oracle/pfile.ora' from spfile;exit ;/home/ oracle/pfile.ora 10.211.55.112:/ tmp$ORACLE_HOME /dbs/ orapworcl 10.211 .55.112 :$ORACLE_HOME /dbs/u01/ app/oracle/ admin/orcl/ adump/oradata/ orcl/1 2 3 4 5 6 7 8 9 10 11 12 13 14
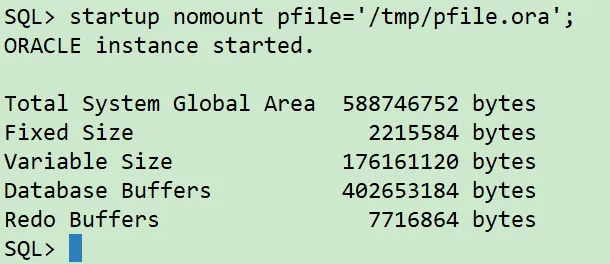
新主机使用修改后的参数文件打开数据库实例到nomount状态:
1
2
3
4
5
6
7
sqlplus / as sysdba'/tmp/pfile.ora' ;
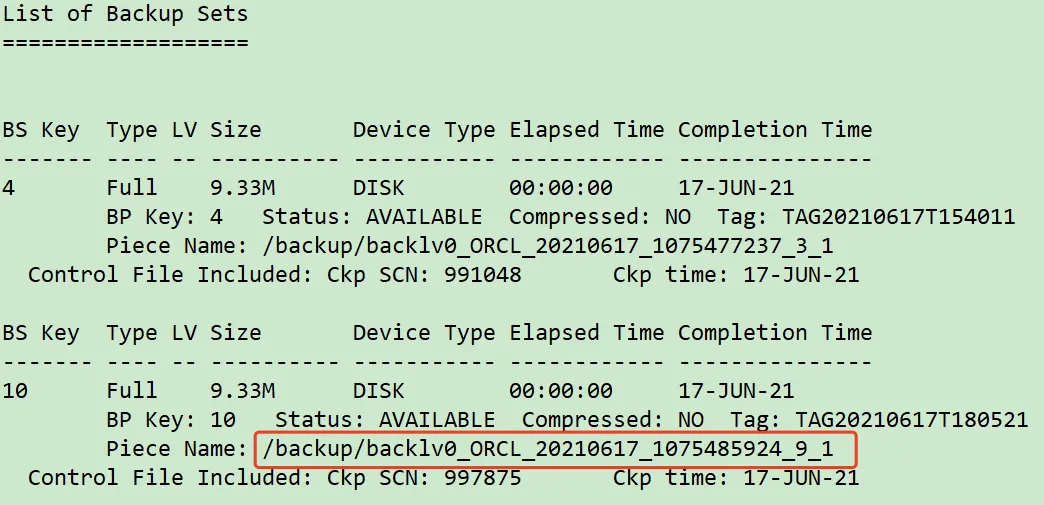
主库拷贝备份的控制文件至新主机,新主机使用RMAN恢复控制文件,并且MOUNT新实例:
1
2
3
4
5
6
7
8
9
10
11
12
13
14
15
16
17
18
19
20
21
22
23
rman target /exit ;/backup/ backlv0_ORCL_20210617_107548592* 10.211 .55.112 :/tmp/u01/ app/oracle/ product/11.2.0/ db/dbs/ 0 c01l775_1_1 10.211 .55.112 :/tmp'/tmp/backlv0_ORCL_20210617_1075485924_9_1' ;1 2 3 4 5 6 7 8 9 10
通过 list backup of controlfile; 可以看到控制文件位置:
新主机RESTORE TABLESPACE恢复至时间点 <2021/06/17 18:06:00> :
1
2
3
4
5
6
7
8
9
10
11
12
13
14
15
16
17
18
19
20
21
22
23
24
25
26
27
28
29
30
31
32
33
34
35
## 新主机注册备份集type disk;run {set nls_date_format="yyyy-mm-dd hh24:mi:ss" ';set until time '2021-06-17 18:06:00';type disk;type disk;restore tablespace SYSTEM,SYSAUX,UNDOTBS1,USERS,LUCIFER;
新主机RECOVER DATABASE SKIP TABLESPACE恢复至时间点 <2021/06/17 18:06:00> :
1
2
3
4
5
6
7
8
9
10
11
12
13
14
15
16
17
18
19
rman target /run {set nls_date_format="yyyy-mm-dd hh24:mi:ss" ';set until time '2021-06-17 18:06:00';type disk;
这里有一个小BUG: 客户环境是Windows,执行这一步最后报错,手动offline数据文件依然无法开启数据库。
解决方案:
1
2
3
4
5
6
7
8
9
10
11
12
13
sqlplus / as sysdbadrop 掉,执行以下查询结果select 'alter database datafile ' || file_id ||' offline drop;' from dba_data_files where tablespace_name in ('LTEST' ,'EXAMPLE' );alter database open read only ;1 2 3 4 5
📢 注意: 如果显示缺归档日志,可以参考如下步骤:
1
2
3
4
5
6
7
8
9
10
11
12
13
14
15
16
17
18
19
20
21
22
23
24
25
26
27
28
29
30
31
32
33
34
35
36
37
38
39
40
41
42
43
44
45
46
47
48
49
sqlplus / as sysdbaset nls_date_format="yyyy-mm-dd hh24:mi:ss" ; $archived_log where sequence#='7';exit ;RESTORE 吐出所需的归档日志 run { type disk; SET ARCHIVELOG DESTINATION TO '/archivelog';restore ARCHIVELOG SEQUENCE 7; run { set nls_date_format="yyyy-mm-dd hh24:mi:ss" '; set until time '2021-06-17 18:06:00'; type disk;
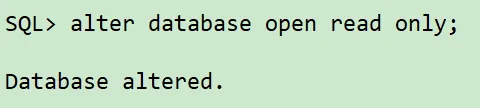
新主机实例开启到只读模式:
1
2
3
4
5
6
7
sqlplus / as sysdbaalter database open read only ;1 2
1
2
3
4
5
6
7
sqlplus / as sysdbaselect * from lucifer.lucifer;1 2
📢 注意: 若不正确则重复 第7步 调整时间点慢慢往 2021/06/17 18:10:00 推进恢复:
1
2
3
4
5
6
7
8
9
10
11
12
13
14
15
16
17
18
19
20
21
22
23
24
25
26
27
28
29
30
31
## 关闭数据库as sysdbarun {set nls_date_format="yyyy-mm-dd hh24:mi:ss" ';set until time '2021-06-17 18:07:00';type disk;
主库创建连通新主机实例的DBLINK,通过DBLINK从新主机实例捞取表数据:
1
2
3
4
5
6
7
8
9
10
11
12
13
14
15
16
17
18
19
20
21
22
23
24
25
26
27
28
29
30
31
32
33
34
35
sqlplus / as sysdbaBY lucifertable lucifer.lucifer_0618 as select * from lucifer.lucifer@ORCL112;
至此,整个RMAN恢复过程就结束了!
写在最后 备份永远是最后一道防线,所以备份一定要做好!!!